Okay, sorry I've taken so long to add another post but Bronson(my almost 3 month old son) keeps me very busy. And I am also working on several projects at one time. Anyways, without further ado here is my tutorial on my Vintage Burlap Lace Mirror thing.. :)

Alright so here is the finished product.^^^^
Okay so the basic materials needed are:
a mirror (I used a full length mirror-no frame)
Burlap
an old book
tape
hot glue gun and lots of glue sticks
*the optional add on's such as the flowers and lace will be listed at the bottom with individual pictures of the flowers and a vague description of how I made them.
Alright, let's get started! First you will need to tare the pages out of your book.
(For a tutorial on how to make the rolls I used Rebecca Robeson's Youtube Tutorial)
Because she shows you how to make them I did not take the time to take pictures of how to make them but once you have them made (you will need A LOT) then the next step is gluing them down.

From the front

From the back

First layer complete.
Now for the second layer I made the same rolls and then wrapped burlap around them.

wrap the burlap around and glue the back.
I'm actually going to go back and make a video on exactly how I did this because I had a certain technique. But I'm sure any way would work.

This is the finished burlap covered roll.

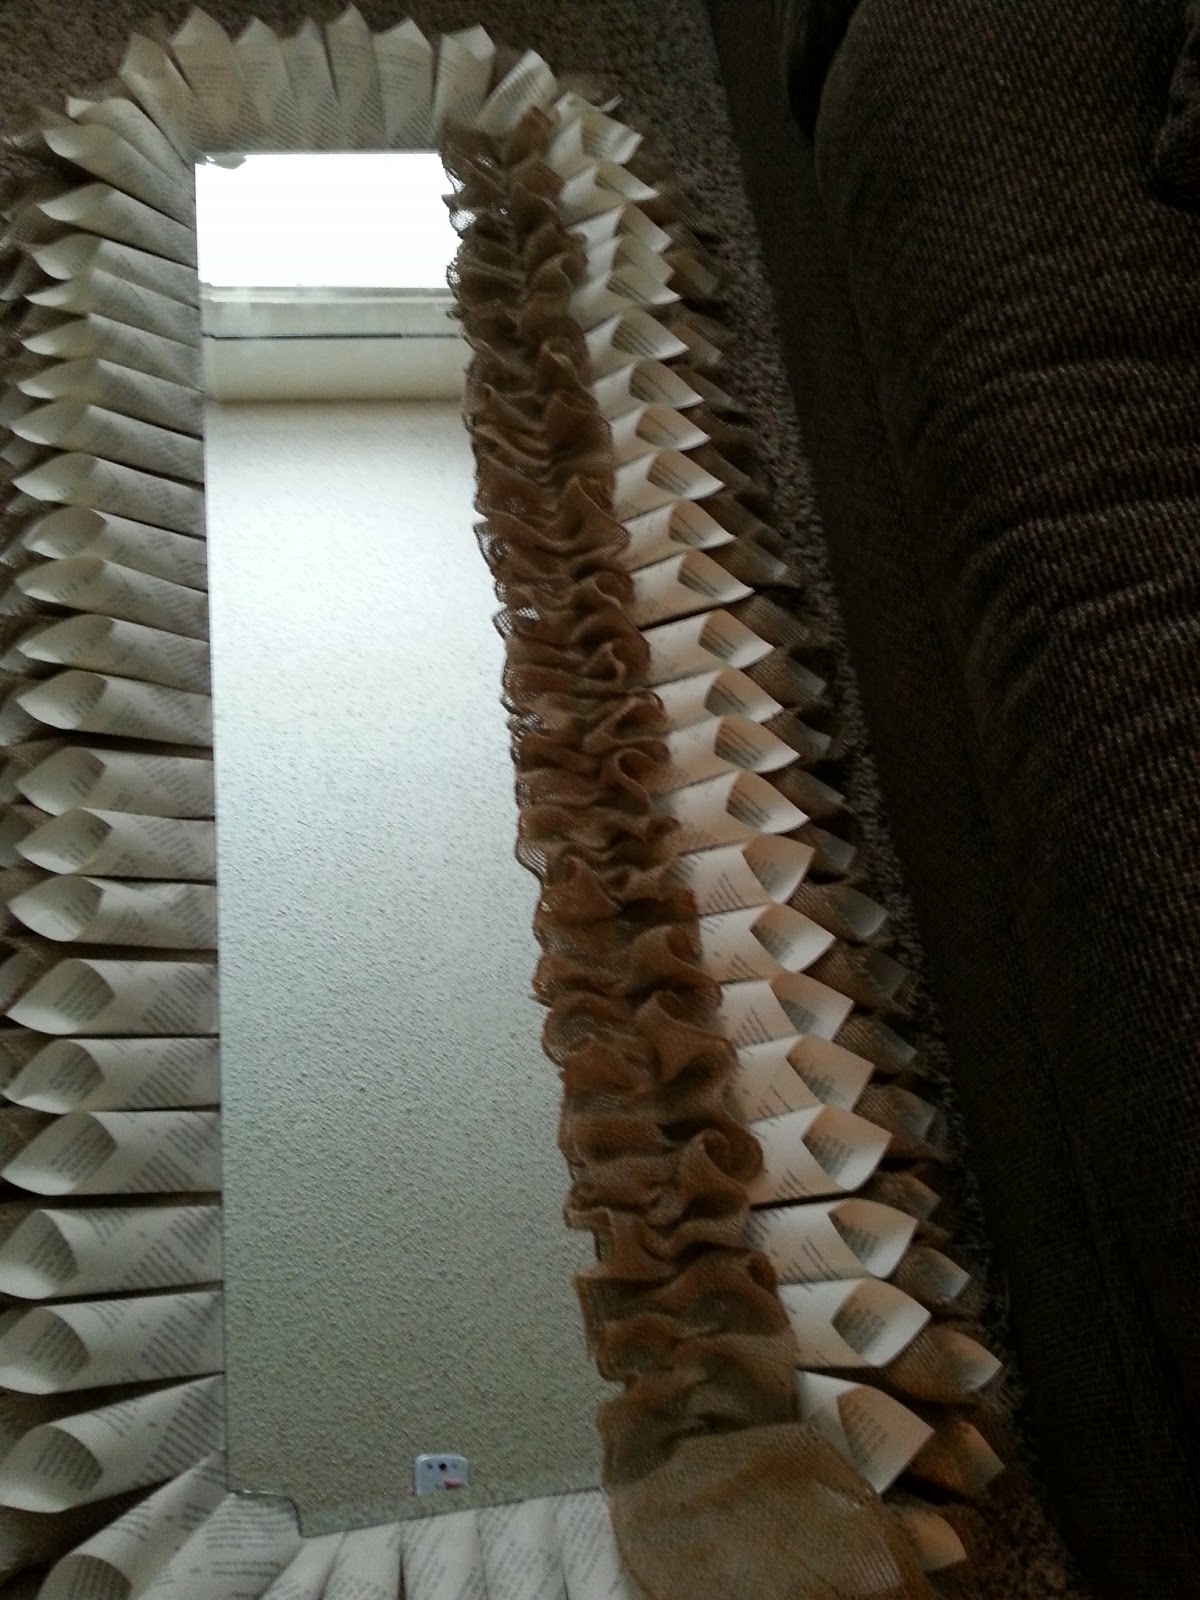
now you are going to glue the burlap rolls behind the first layer of rolls.

keep gluing. .

Now as you can see, my rolls came out all crooked so I had to go back and straighten them out (by ripping them off and gluing them back on.-so.. glue them straight..lol) I also had to go fill in some gaps around the corners so be prepared to use some extra burlap rolls.
Now once you have that complete you can go back to the front and add the burlap ruffle or leave it how it is. I was originally going to add a brown ruffled ribbon but thought the lace looked better.

So this is the start of my burlap ruffle. I did not thread it first, I just put hot glue down and gathered it as I went.

gather the burlap. Doesn't have to be perfect. The less perfect, the better.

hot glue, then gather. Glue, then gather.

Progress. This is time consuming and can become tiresome.
alright now when I got to the corners I just turned the burlap and still gathered as I went. The corners seem like a lot of gathered burlap but don't worry, it will look good in the end.

Turning the corner again.

Finished. Now you could just stop here and hang your mirror and I think it would look very nice. However, my mirror is the centerpiece in my living room so I felt I needed to spice it up a bit.
The flowers:
I made 4 different flowers, all from different things. I will show each flower and what you will need to make it.

alright so here are the 4 flowers. As you can see 2 are larger and 2 are smaller. I'll start with my larger flowers first.
so here I used a lighter color burlap which is actually wired burlap ribbon that you can find at Walmart. I then made a flower which you can see how in my other blog The Burlap LOVE Sign where I show how to gather one side and then finish off the end by wrapping the wire around the burlap. With the flower you just take your ruffled burlap and wrap it in a circle and tad-ah! Then I went in and added a piece of ribbon, I just glued it to my already made burlap flower. :)

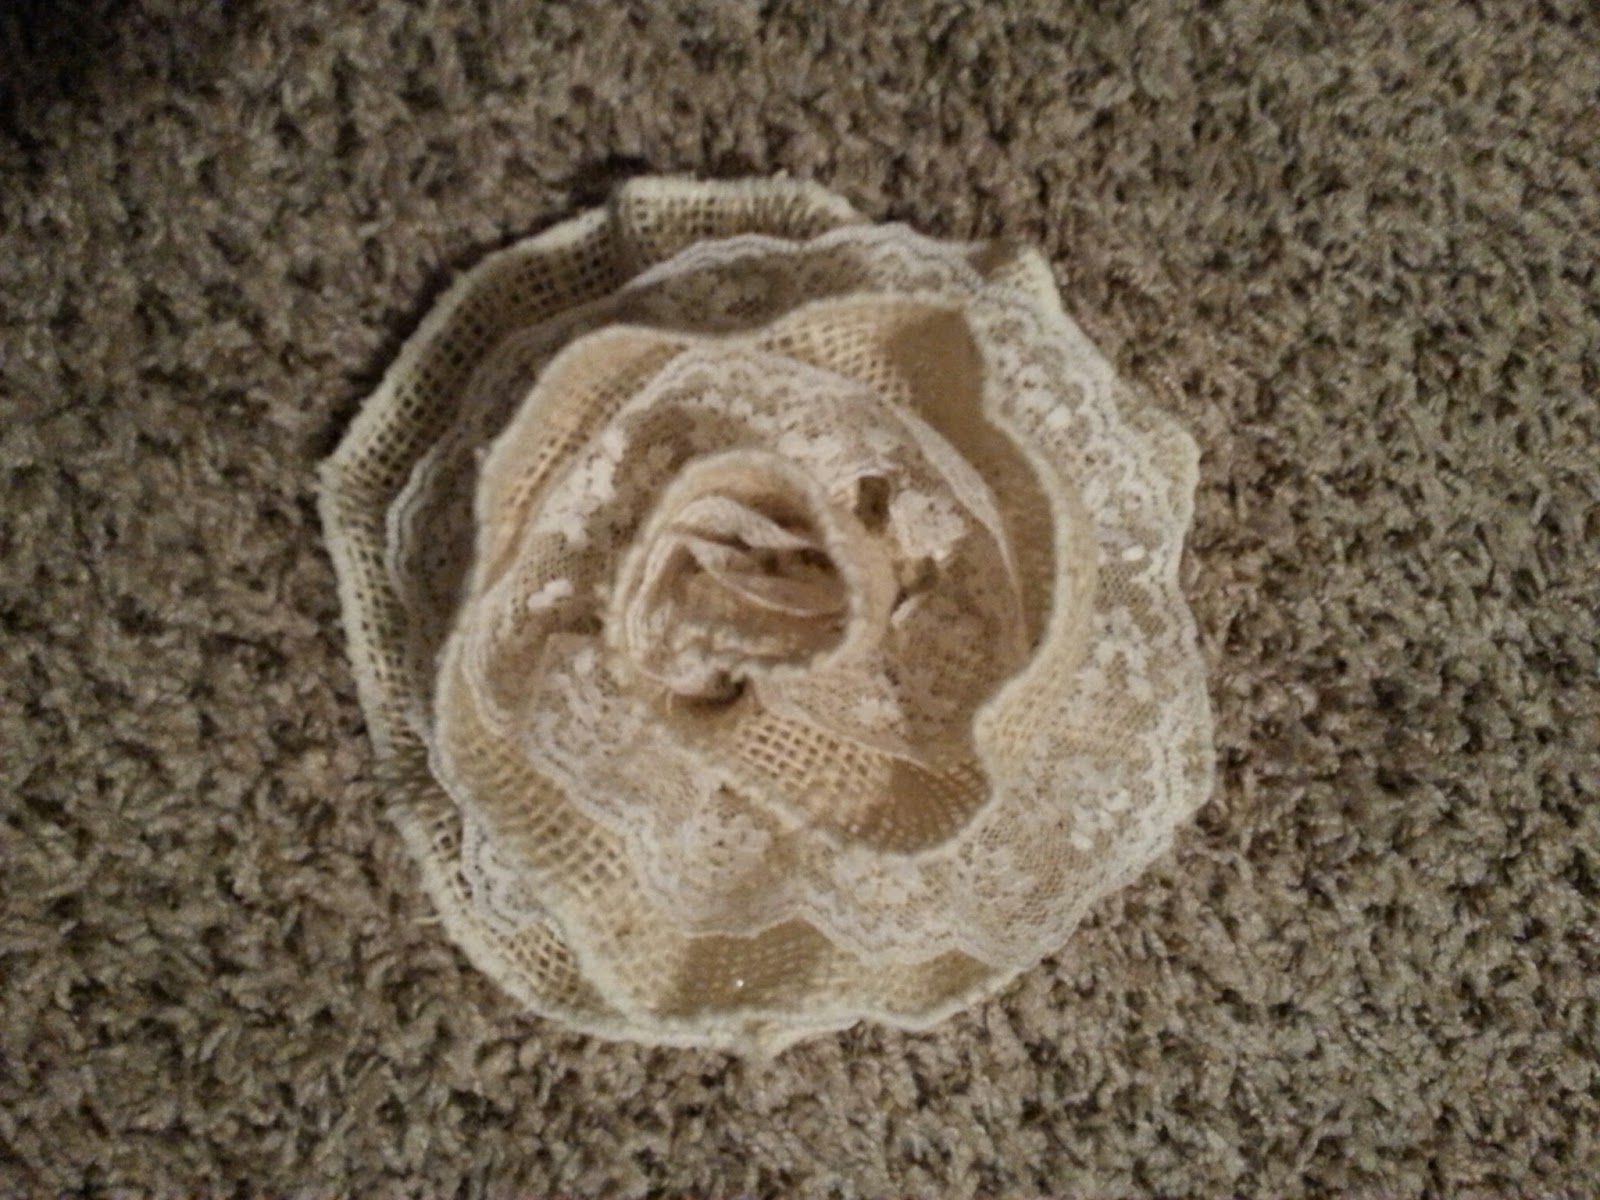
Now for this flower you will need a couple more pages from your book, (which I cut into squares) then used Yummy Shabbychic Flower Tutorial and just replaced the silk with paper. Then for the middle I added lace. Then added 2 little burlap 'flower pedals'.

Now this I got almost directly from the Yummy Shabbychic Flower Tutorial. However I used an old curtain. Then for the middle I gathered a little material from a laced ruffled shirt of mine.

Okay now I kind of cheated on this flower. I put what you will need below.

So I actually bought this flower from Hobby Lobby then added the lace ribbon(which is the same ribbon I used in the Burlap flower) and just glued it under the middle doily. Then added 2 little 'Shabbychic flower pedals' and then cut the straight lace ribbon into 2 pieces and glued them to the back of the flower.
( I am going to go back and add videos of how to make these when I have the chance)
Alright so now I just added my flowers and some extra ribbon to my mirror and there we have it!


Thank you so much for visiting! See you next time and I'm sorry I don't have more pictures or videos :/ I am going to add them when I can though. If you have any questions about further explanation or comments/advise, etc., please leave them below! :)
No comments:
Post a Comment